For fitness reasons, I have been logging my diet and weight for most of the last 1.5 years. At first, I started with just paper and pen but quickly found it cumbersome to carry a notebook with me whenever I wanted to log.
I quickly moved on to using Google Sheets to keep track of everything. This solved the issue of portability and even cross platform accessibility. However, as I continue to log every single day I have noticed these problems:
- Annoying to have to scroll through previous data to get to enter today's entry
- Can't keep a history of meals to avoid retyping
- Have to manually calculate 7 day average of weight
- Mobile app for sheets is buggy (sometimes doesn't load data past the first 1000 rows)
- Limited graphing option and graph layout isn't ideal for viewing
Given that logging is now an important part of my life, I have decided to build a web app called DashFit to handle all the fitness related data input/storage/display.
Choosing a development stack
The first order of business is to choose a development stack. At the time of writing, there are more than a dozen popular development stacks.
From previous project experience, I believe it is important to start off with good code architecture to make maintenance and updates easy. Part of this comes from choosing the right stack.
In the UI department, one library that stands out is React. Treating your UI as reusable modules will aid in clarity and long term maintainability. A downside from using React is that it requires building/pre-processing.
I want to keep the build tools as simple as possible, since many of the fancier tools go out of date fairly quickly and have a steep learning curve. My build tool of choice is WebPack, which is simple to use and not hard to learn. The idea behind WebPack is elegant: imagine your dependencies as a tree where each node is a module and edges are requires, you basically provide it the root (react file where you do all the requires) and it traverses the tree until it loads all the dependencies and their respective dependencies.
In terms of the back end, I see no reason to move away from Express and mongoDB. So all in all, I am using the MERN stack (mongo, express, react, node).
Thinking in React
Using React is like learning web development all over again. The thinking in React is very different from any UI work I have done before and one such aspect is styling.
React seems to advocate(they have since taken down the article as of March 2017) inline styling, something that I do not agree with - so I will instead use LESS and style elements like I have always done. However, I also see value in React's way of thinking - which is to keep components their own respective, independent unit including its own styling.
As such, I will use LESS as a preprocessor and organize my file structure such that each component has its own stylesheet in development that gets bundled together for production.
Eg.
|components
  |Header
    |Header.jsx
    |Header.less
  |Nav
  |Container
  |Footer
Notice that the react code also lives in its own folder. WebPack will bundle these as well for production.
Features
- User authorization system
- Use Passport.js to support email login
- Weight logging
- Table view of weight for the week
- Ability to view and edit week data
- Undo redo
- Accept kg. and lb. input
- Diet logging
- Table view of daily caloric intake for the day and week
- Ability to store custom recipes and their calories/protein
- Auto complete input based on previous recipes
- Data visualization
- Graph weekly average of weight
Update 1 (10/21/17):
It's been a while but I have been implementing the aforementioned feature throughout the summer. The code can be found on github.
The original feature list now looks like:
User authorization system
Use Passport.js to support email login
- Weight logging
Table view of weight for the weekAbility to view and edit week data- Undo redo
- Accept kg. and lb. input
- Diet logging
- Table view of daily caloric intake for the
dayand week - Ability to store custom recipes and their calories/protein
- Auto complete input based on previous recipes
- Table view of daily caloric intake for the
- Data visualization
Graph weekly average of weight
So I would say that the core features are implemented but the bells and whistles should still be added on at some point.
Here is what the webpages look like as of now:
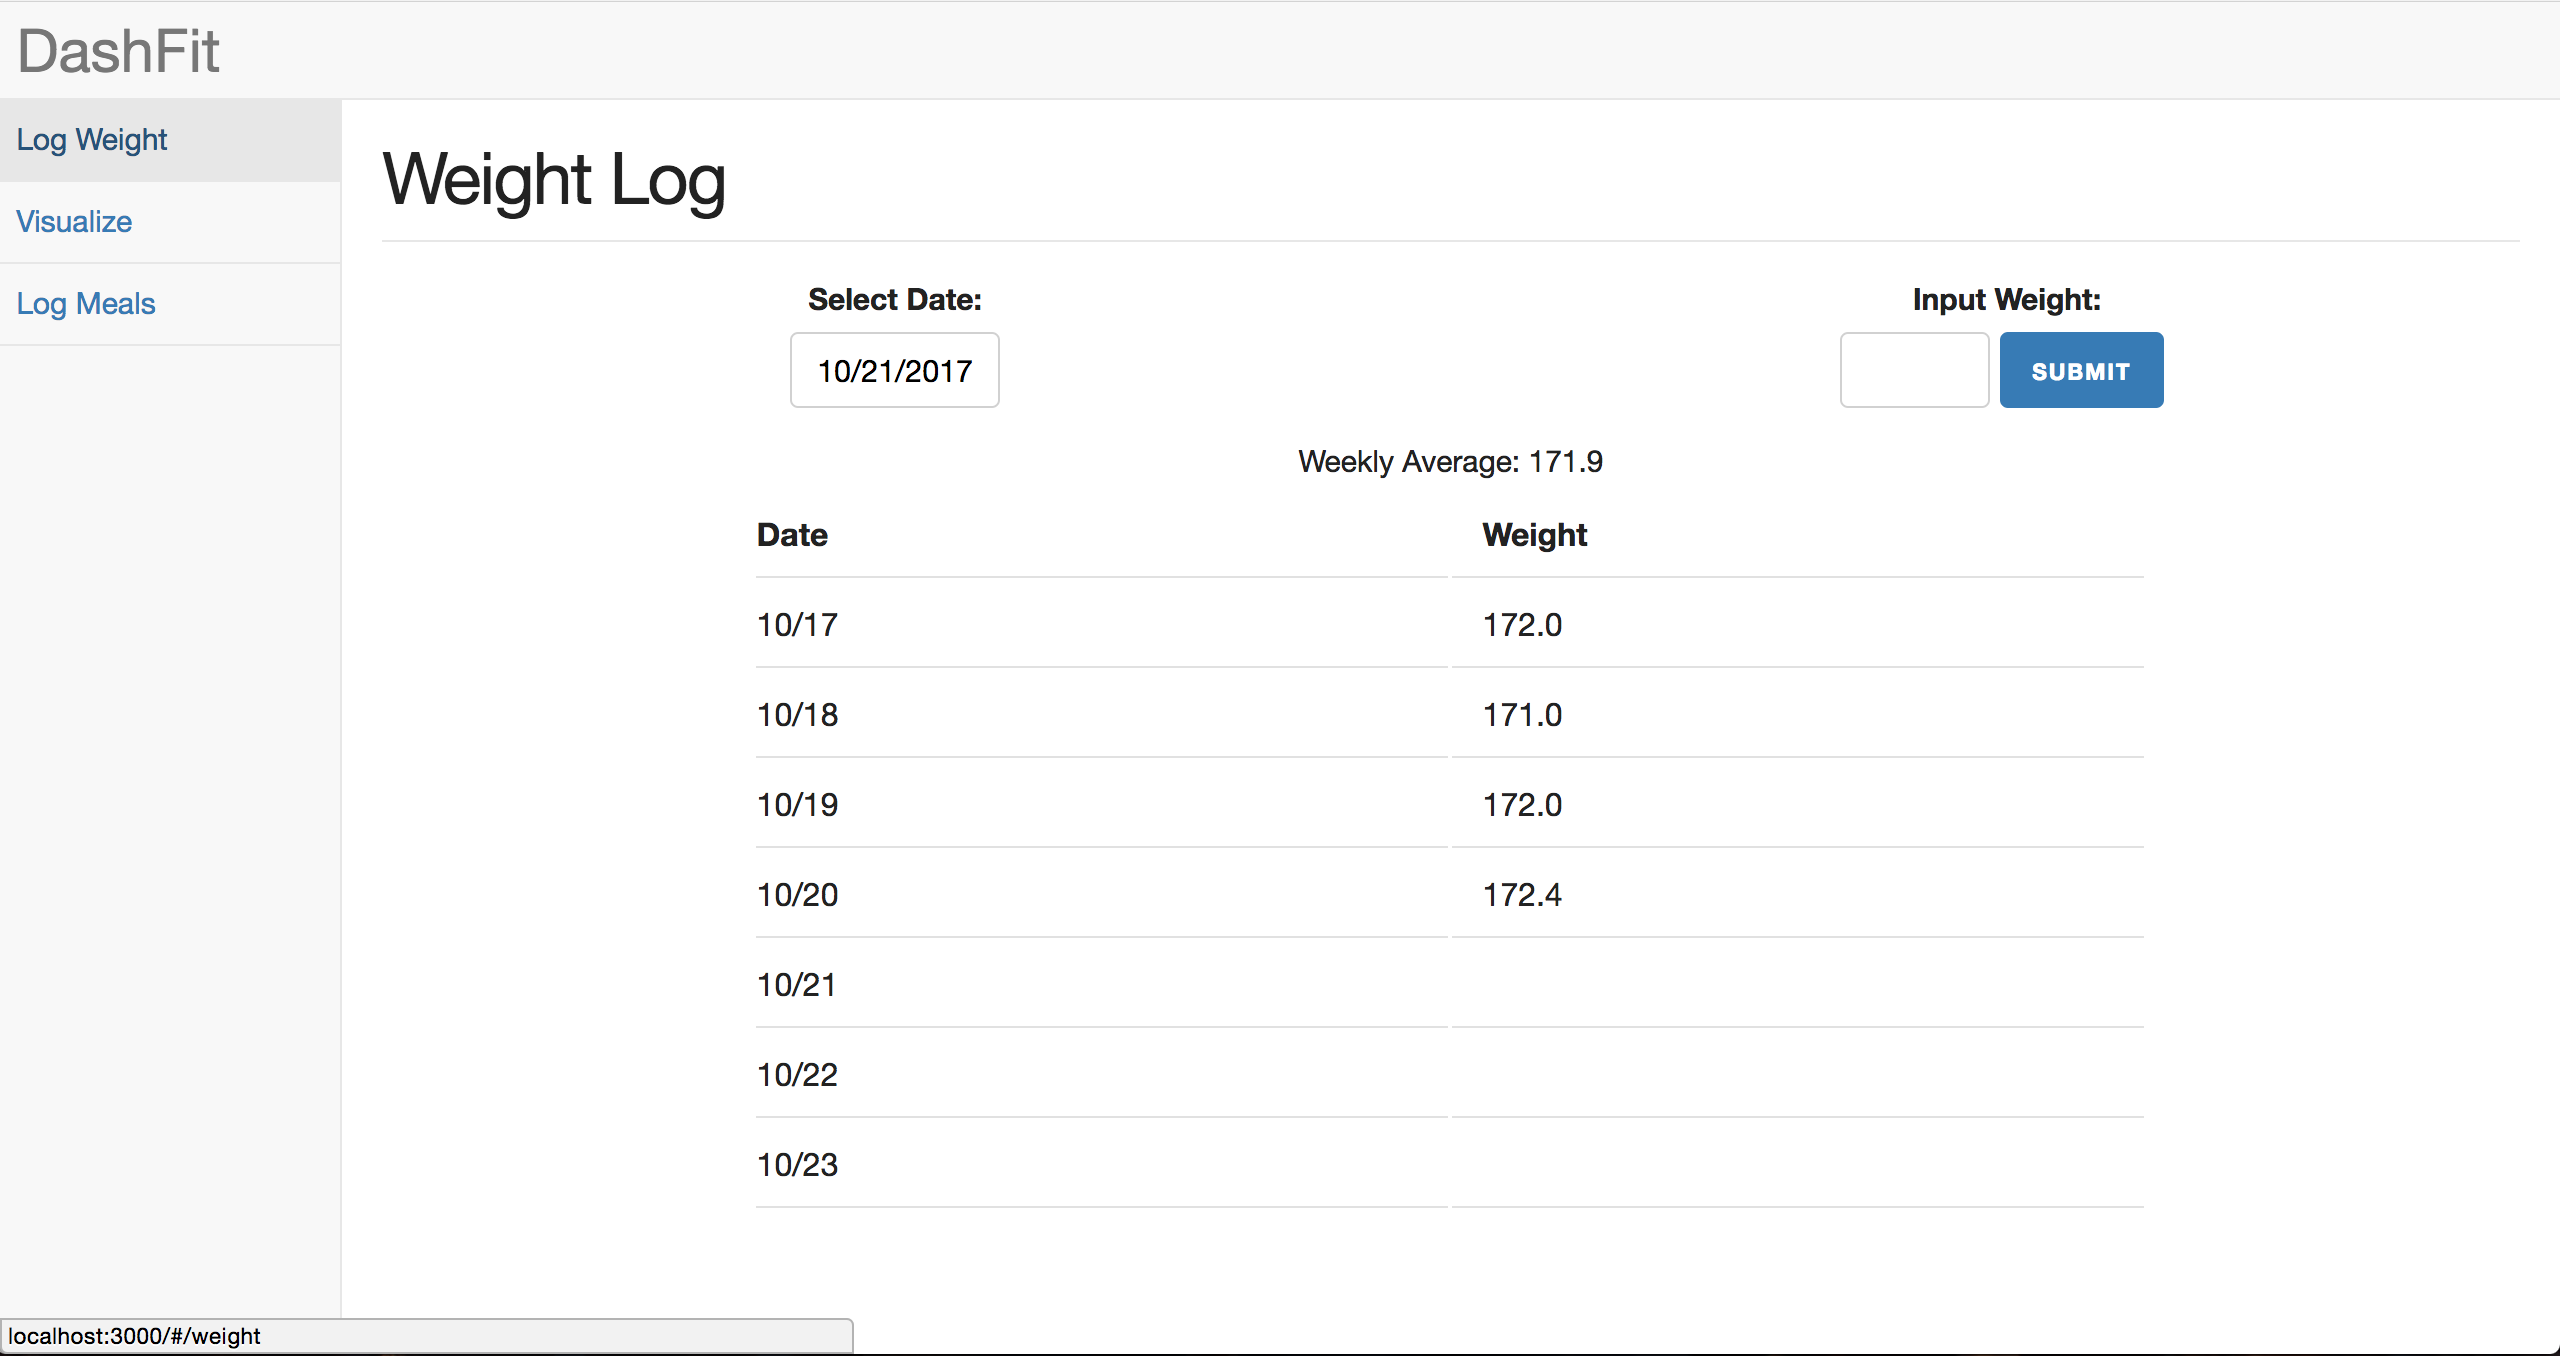
This is the first page that I ended up implementing. I wanted the UI to have a modern, lightweight feel so lots of whitespace and simplicity is what I ended up going with.
For styling, I used skeleton as a starting point and LESS as my preprocessor. React is amazingly fast thanks to their virtual DOM diffing process. Lastly, for layout I went for a standard dashboard theme. This design was highly inspired by the dashboard template for Bootstrap but I ended up building the website from grounds up. This is the initial layout I was going with:

You could probably see the similatiry between that and the current design, except I stripped away the color scheme in favor of a flatter tone.
React's modular nature also made it easy to organize components. For each tab on the left (log weight, visualize, log meals), I have defined "widget" that acts as a kind of scaffolding that calls all the components in the page and brings them all to a functional "sub-app".
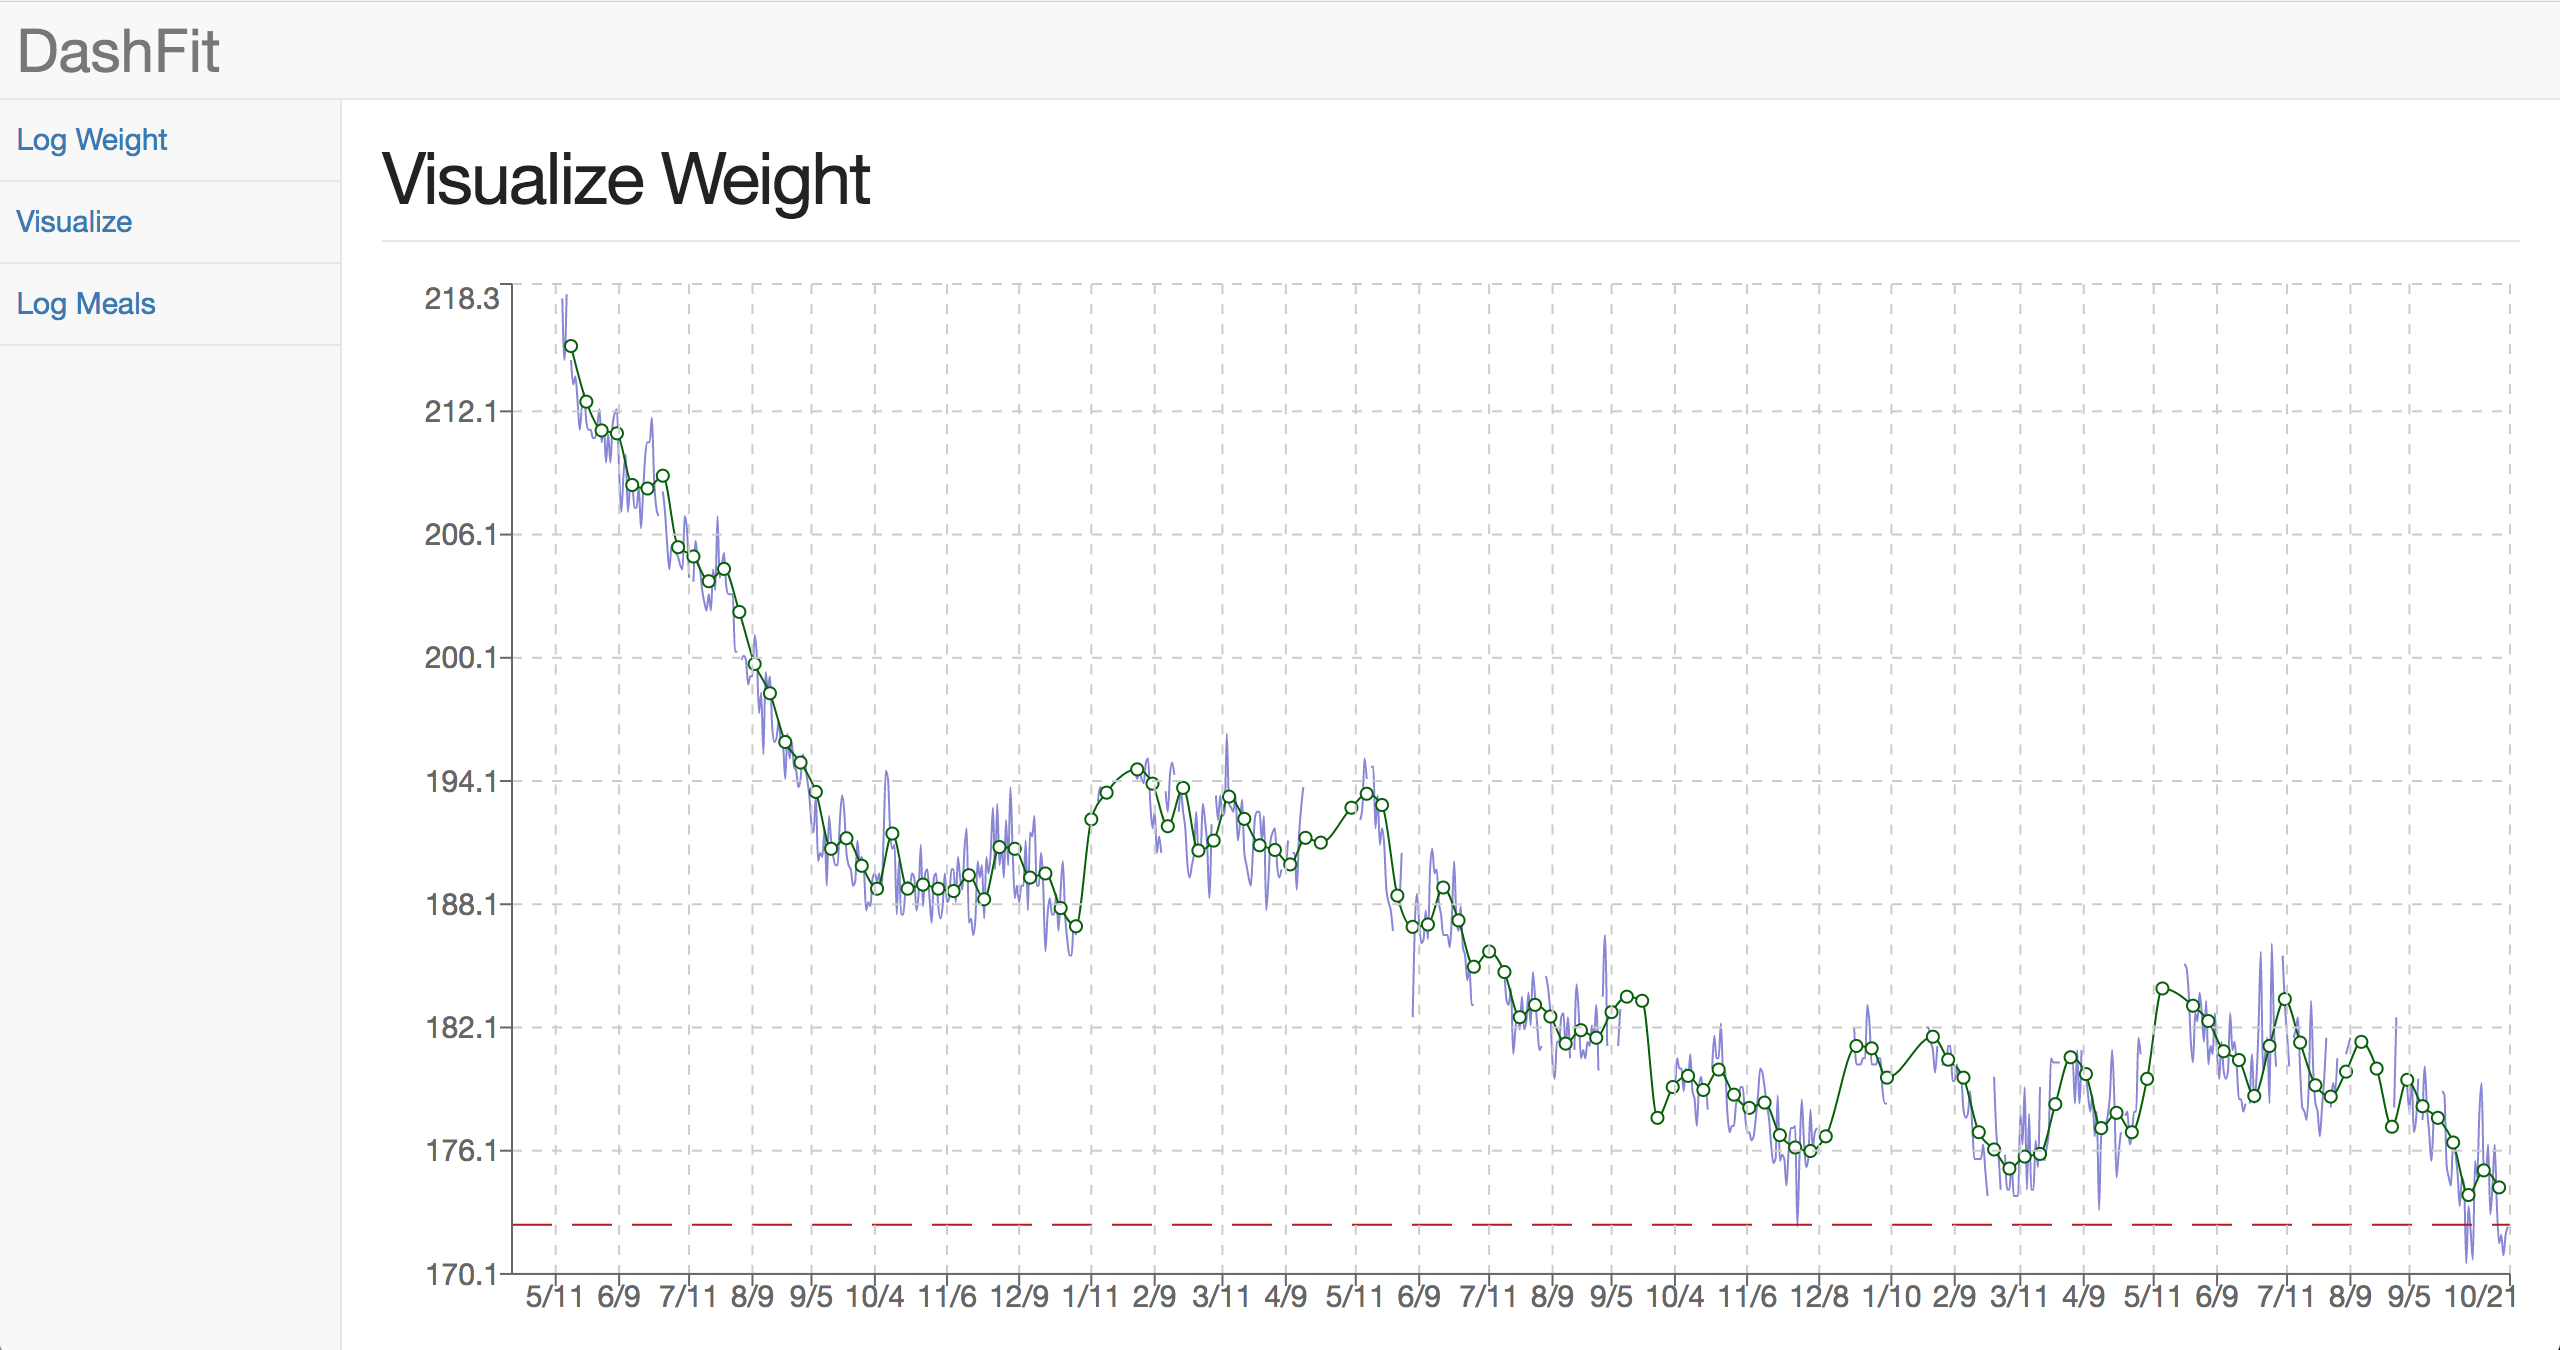
For this part, I used the react plotting library Recharts. This library had some issues that I ended up actually helping identify but for personal project plotting I think it works well enough but I would be hesistant using it in a production environment.
Pictured above is my weight trend for the last ~2 years. The purple line is the daily weight and the green line is the weekly average.
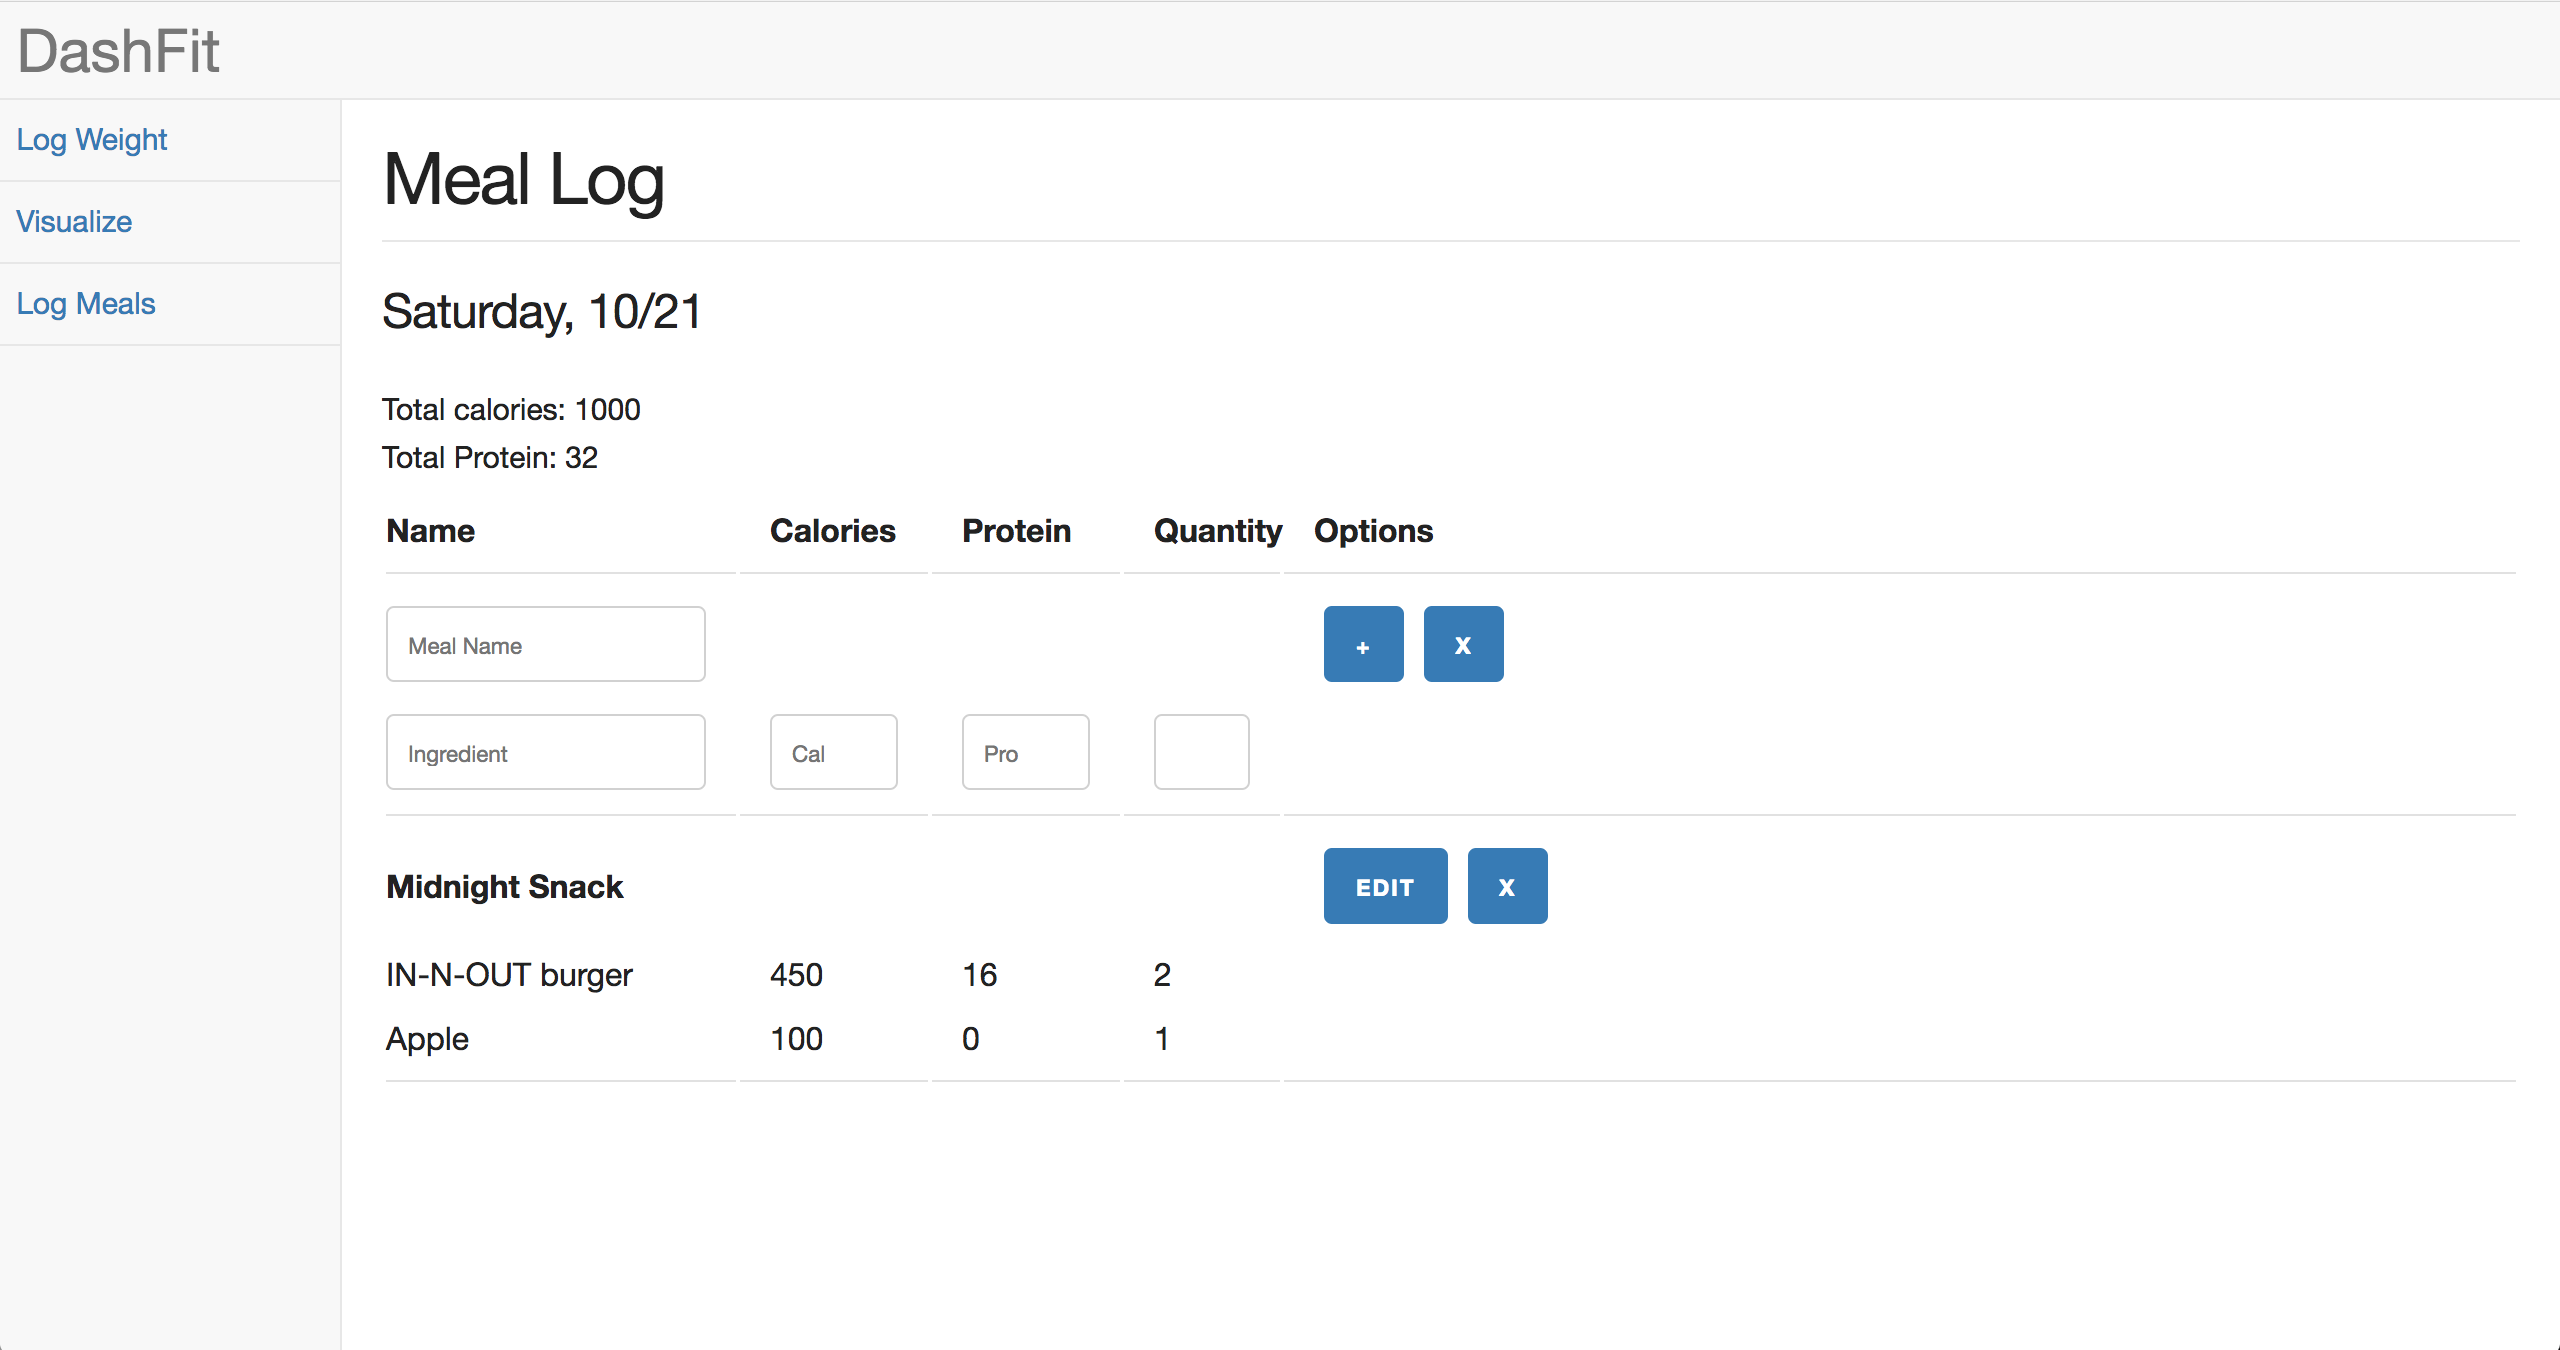
At this point, I was fed up with the way states were kept. Specifically, they have to "bubble" up to a parent component.
Thankfully, React has a solution for this: Flux! I implemented the meal log using this and I must say: its design philosophy is simply elegant and makes building large UIs much more manageable.
Additionally, it makes code more readable and less likely to fail from improper handling of data.
Right now, I am thinking about refactoring the first two parts of the code using Flux so will likely implement the missing features when I find time for that.